Ensuring your Wavlink Wi-Fi extender operates at peak performance is crucial for a seamless internet experience. One of the key ways to achieve this is by regularly updating the firmware. New firmware releases often address bugs, enhance security features, and introduce performance improvements. This guide will walk you through the process of updating the firmware on Wavlink extender, ensuring you experience reliable and robust Wi-Fi coverage.
What is Firmware and Why Update It?
Think of your Wavlink extender like a high-tech gadget. Just as any device does, it requires occasional software updates to operate at its peak. The firmware acts as the software brain of your extender, managing its essential functions and features. By updating the firmware on Wavlink extender, you’re essentially giving your extender a refresh, making sure it stays current with the newest security improvements, bug fixes, and performance upgrades. It’s like giving your device a boost for better functionality.
How Often Should I Update the Firmware?
Wavlink recommends checking for firmware updates periodically, ideally every few months. You can manually check for updates by logging into the extender’s web interface. Alternatively, some Wavlink models offer automatic firmware updates, which can be enabled from the settings menu.
Before You Begin: Important Considerations
1. Backup your extender settings: Updating the firmware on Wavlink extender can sometimes reset your extender settings. To avoid losing your configuration, back up your settings before proceeding. You can usually find the backup option in the extender’s web interface.
2. Download the correct firmware: It’s crucial to download the correct firmware version for your specific Wavlink extender model. Downloading and installing the wrong version can cause serious problems. You can find the latest firmware versions on the Wavlink website.
3. Stable internet connection: Ensure you have a stable internet connection throughout the update process. A sudden disconnection during the update can brick your extender.
Updating the Firmware via Web Interface (Recommended)
This is the most straightforward method and works for most Wavlink extender models.
1. Connect to your Wavlink extender: You can connect through Wi-Fi or an Ethernet cable.
2. Open a web browser: Enter the default IP address 192.168.10.1 or wavlogin.link in the address bar.
3. Login: Enter the default username and password (usually “admin” for both).
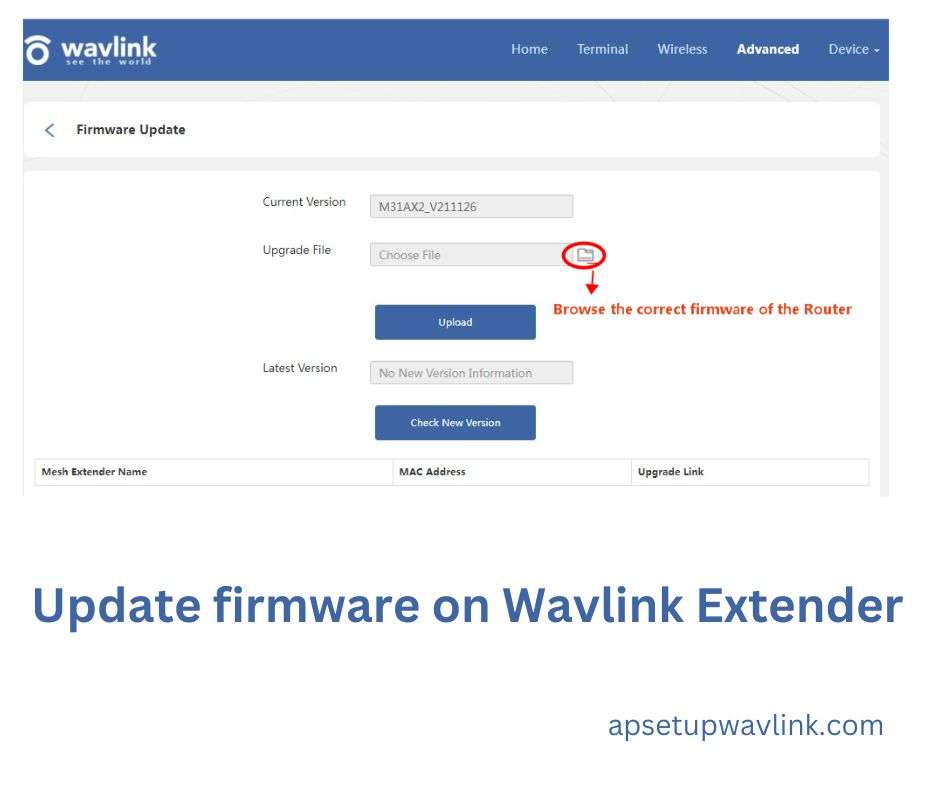
4. Navigate to the Firmware Update section: This might be located under “Advanced” or “System” settings.
5. Download the latest firmware: Click the “Browse” button and select the downloaded firmware file.
6. Start the update: Click “Update” and wait for the process to complete. This may take several minutes.
7. Reboot your extender: Once the update is finished, the extender will automatically reboot.
Alternative Methods: TFTP and Recovery Mode
For situations where the web interface update fails, Wavlink offers alternative methods:
1. TFTP Update: This method involves using a specific software called TFTP to upload the firmware file directly to the extender. This process is more technical and requires knowledge of networking settings.
2. Recovery Mode: This method resets the extender to factory settings and attempts to reinstall the firmware. This should only be used as a last resort as it erases all your settings.
Troubleshooting Tips
1. Update failed: If the update fails, try restarting your extender and computer. If the issue persists, consult the Wavlink support website or contact their customer service team.
2. Lost internet connection: After updating, if you lose your internet connection, double-check your configuration settings and ensure they are correct.
3. Extender not responding: If your extender becomes unresponsive after the update, try resetting it to factory settings and reconfiguring it.
ALSO READ-
Hasako wifi Extender Setup
Loom Wireless Extender Setup
Generic Wifi Extender Setup
Reset Wavlink Extender
FAQs
